Longitudinal Fairing Completed
Last month, I was focusing on trying to get the fairing done by the 30th. I didnt make it primarily because I ran into problems with the chines around frame 5. They were simply too far inboard and had to be corrected. I wasnt happy with this but I knew that I couldnt give up on the boat. So I spent the last two weeks making corrections as well as tweaking other areas of the fairing.
I am now satisfied with the fit of the test planking on the longitudinal members. I still need to fair the edges of the frames on the bottom, but that will require temporarily adding the bottom battens first, so I will cover that in the future.
What brought all of this about was when I first faired the port chine aft of frame 5 and then started test fitting the plywood. It was immediately apparent that the angle of the chine outer edge was off. The edge of the plywood would have had to wrap around the edge of the chine rather than lie on it flat (as was desired).
Further investigation using a batten stick revealed that the chine was flat from aft of the frame to forward of the frame. It should have been curved. Not good. The batten allowed me to see just how much additional material was needed.
It also showed why the test plywood wasnt lying correctly. If the chine had been further outboard, the angle of the chine outer edge would have been different. I tested more plywood with the batten in place and could see that if the chine was as far outboard as the batten indicated it should be, then the skin would have fit correctly (assuming that the angle also changed on the chine).
This shortage of material also meant that the frame edges on the sides were short. These had been faired down to the chine some time back. At that time I believed the chine to be in the correct position and didnt re-measure the frame width afterwards.
I checked the starboard side and found the same problem, although not quite as bad. Again, the frame edge came up short to the corrected curve. At this point I was pretty depressed about the whole affair and had to step away for several days.
I decided to first measure the frame width with the stick battens in place. The measurement at the corrected curve was the same as indicated on the plans. So I had to figure out a plan of action.
I decided to add shims to the chines first in two sections (forward and aft of frame 5). Then I would add shims to the frame edge on the sides to bring it back in line with the curve. All of this would be done one step at a time. I would ad the shims aft of the frame, fair them, add the shims to the frame and fair them, and then add the next shims forward of the frame and fair them.
I took measurements from the stick battens first so that I would know how much to taper the shims and how long they needed to be (as well as how thick). Because the chine outer edge was already faired on the side and the bottom surfaces, each section had to be done independently of the other.
Here is a shot of the first port side shim on the side mounting surface of the chine after fairing. You can see that I have also added the shim for the frame edge as well.
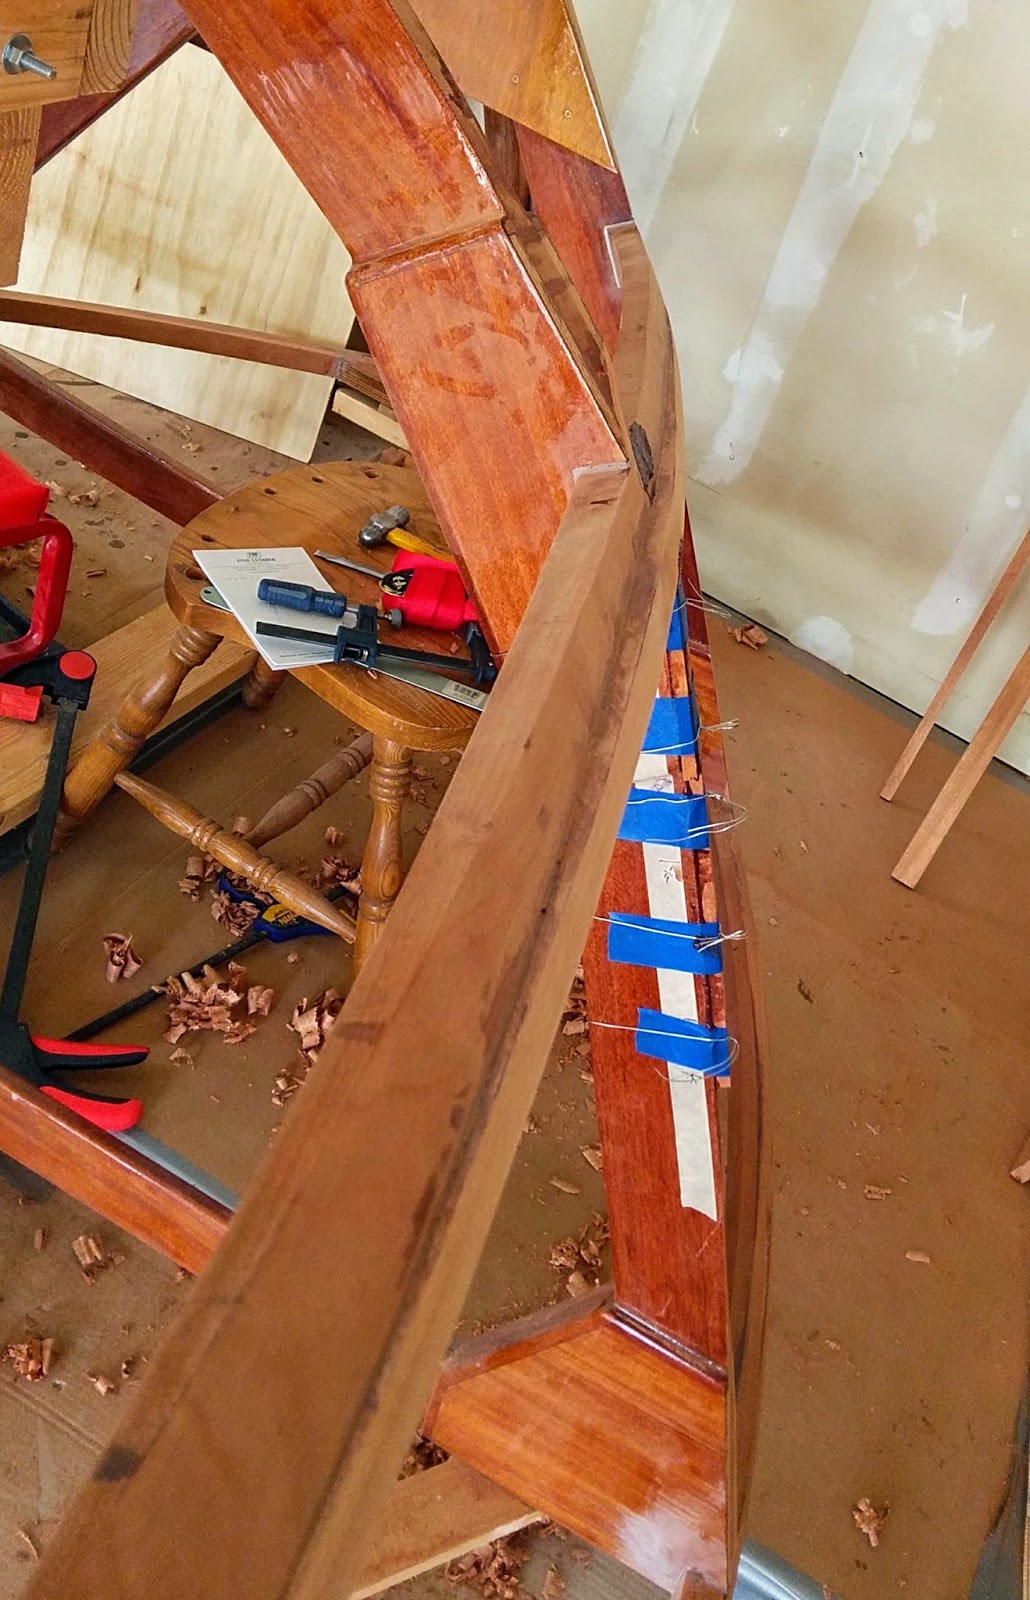
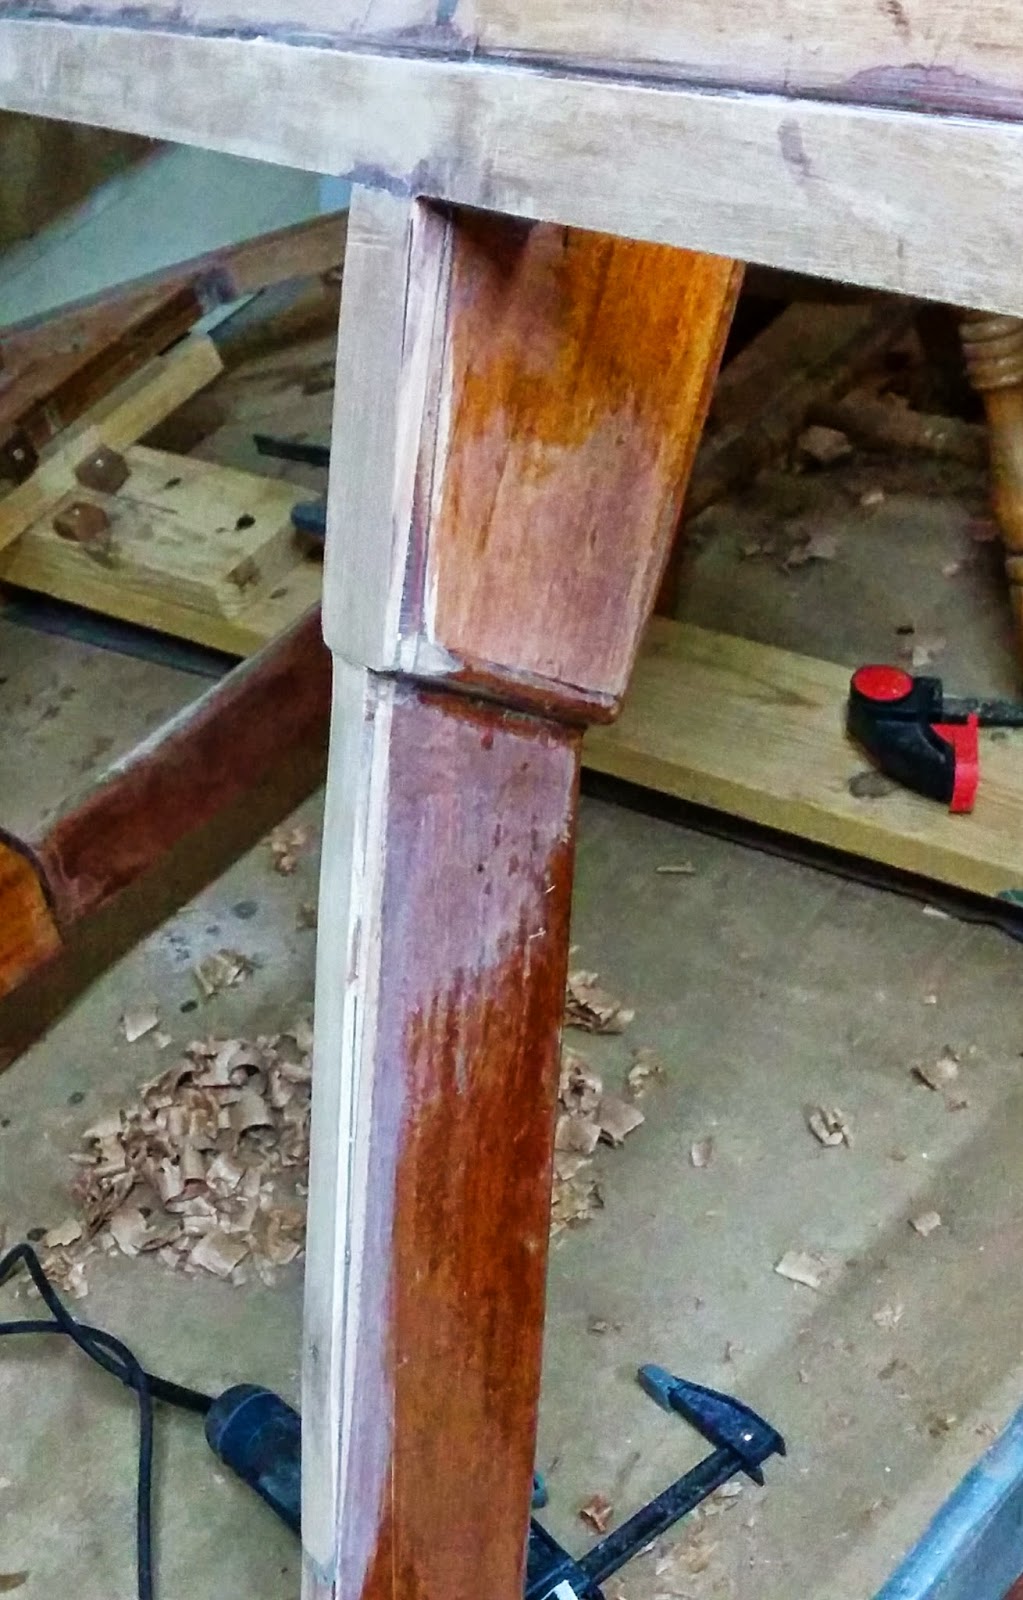
Here is a shot of the starboard side shim on the frame. It was necessary in order to get the frame to come out to the corrected curve on the chine. I havent cleaned any of this up other than to smooth out the epoxy. Part of my tasks this coming month is to re-encapsulate any areas that need the work.
Here is the port side shim aft of frame 5. I have already cut the new angle notches in this photo. The next step would be to blend them into a fair curve.
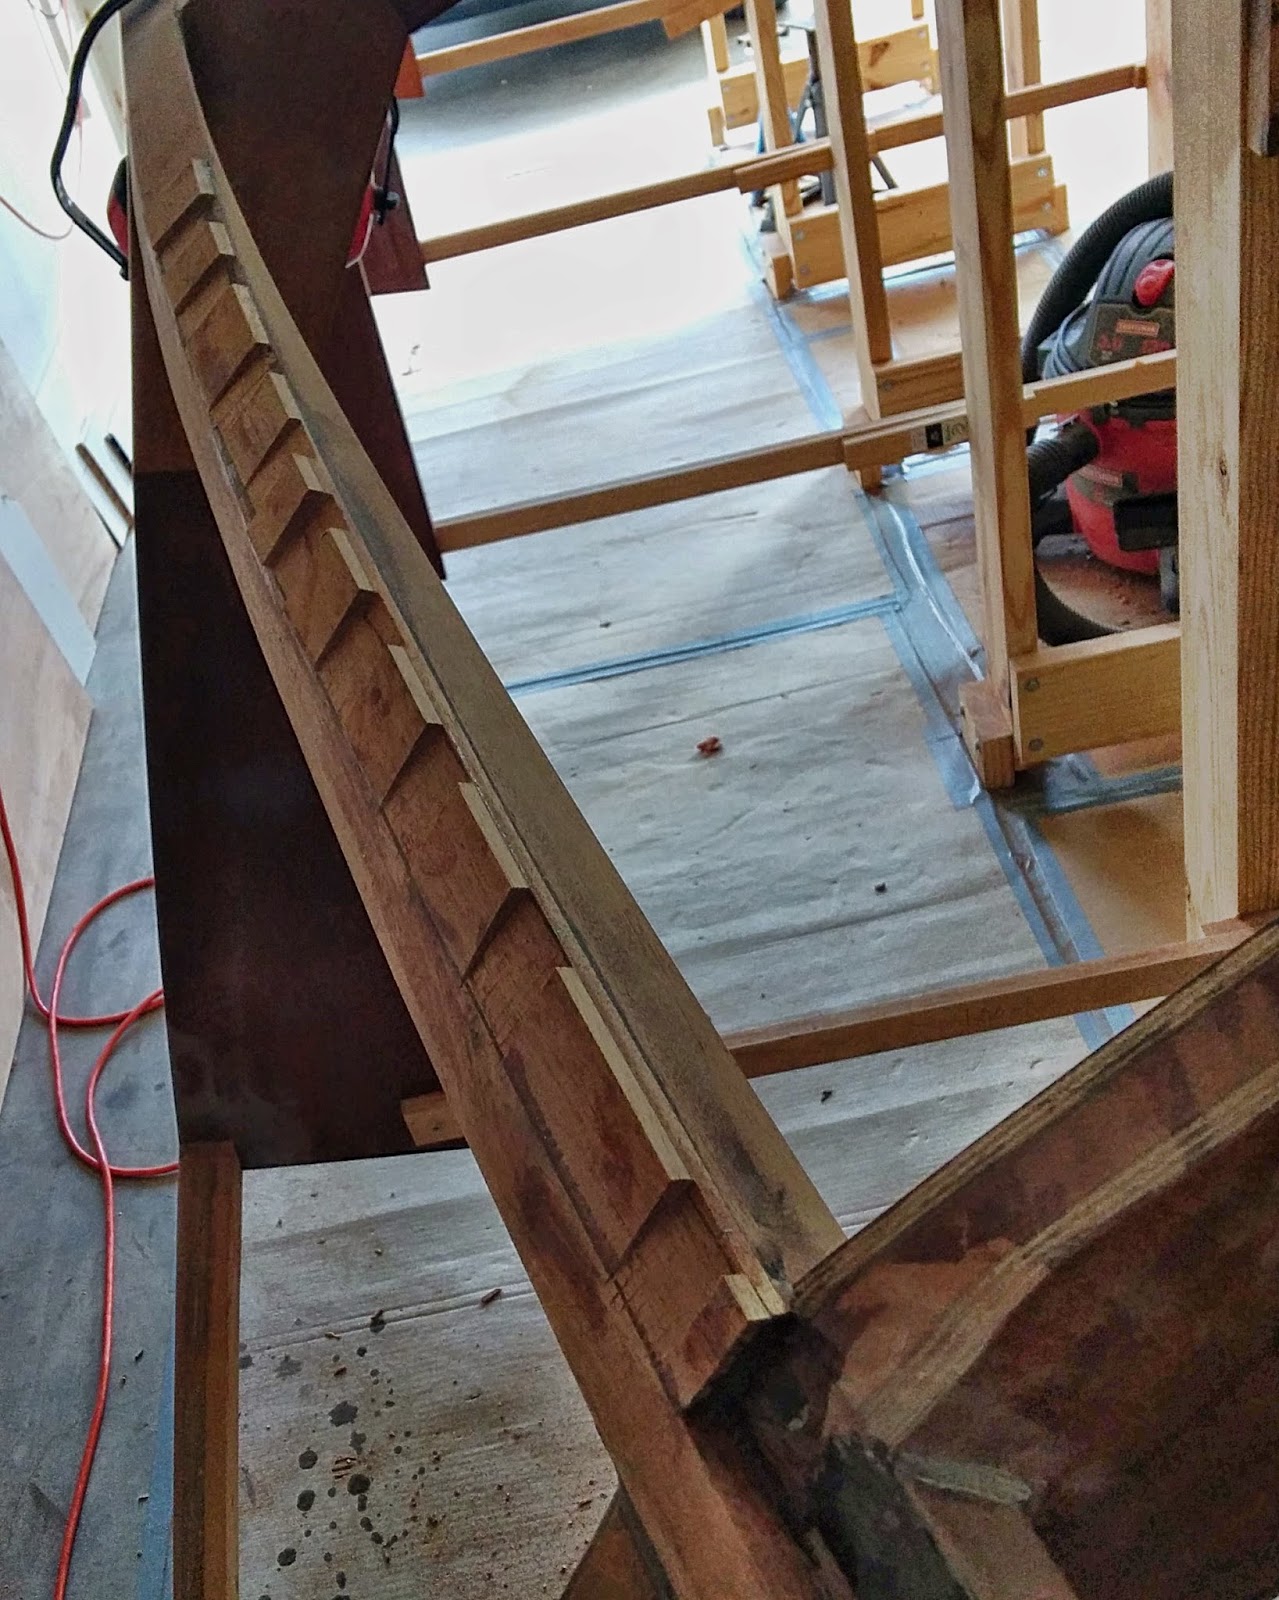
The fair curve to determine the depth of the notches was based upon several reference points. The measurements I took with the stick batten, the points where frames 4 and 5 intersected the chine correctly, and a fair curve determined by using the batten between the reference points.
Here is the same area after blending the angled notches.
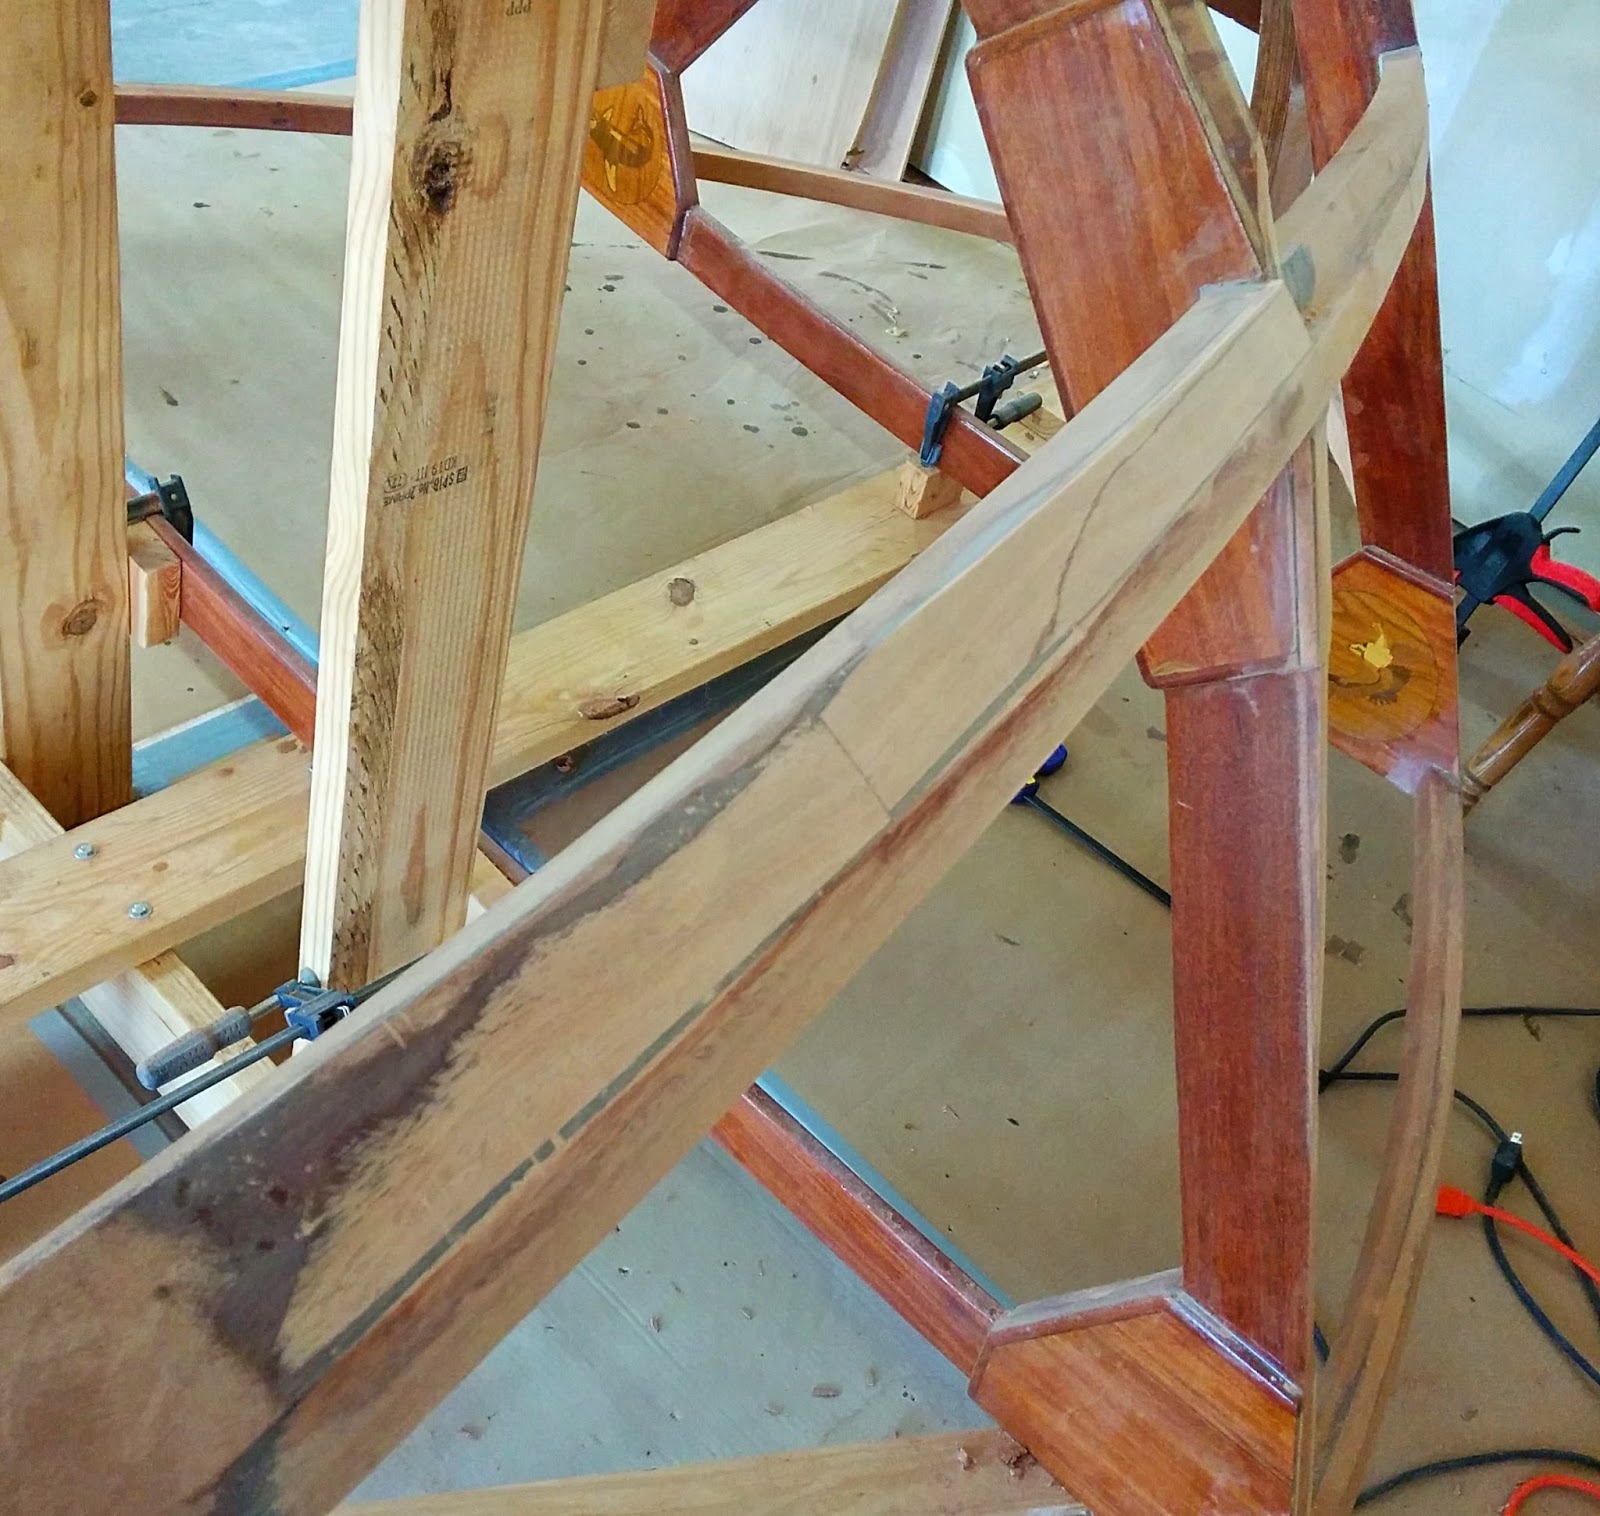
I was apprehensive about doing all of this, but it turned out to be the correct approach. When I fitted the plywood later, it practically laid into position. No doubt the marine plywood (which is stiffer) will be more difficult, but there does not appear to be any sharp bends now and I am hopeful that everything will go smoother from here on.
The area forward of frame 5 had little angle needed so it was much easier to fix. That area was faired in as well and it also fits correctly now.
What I was after is illustrated in the next two shots. The test plywood lies on the chine and keel as well as the frame edge and doesnt require any real force to get it to conform. Furthermore, the second shot shows the fit of the joint on the chine.
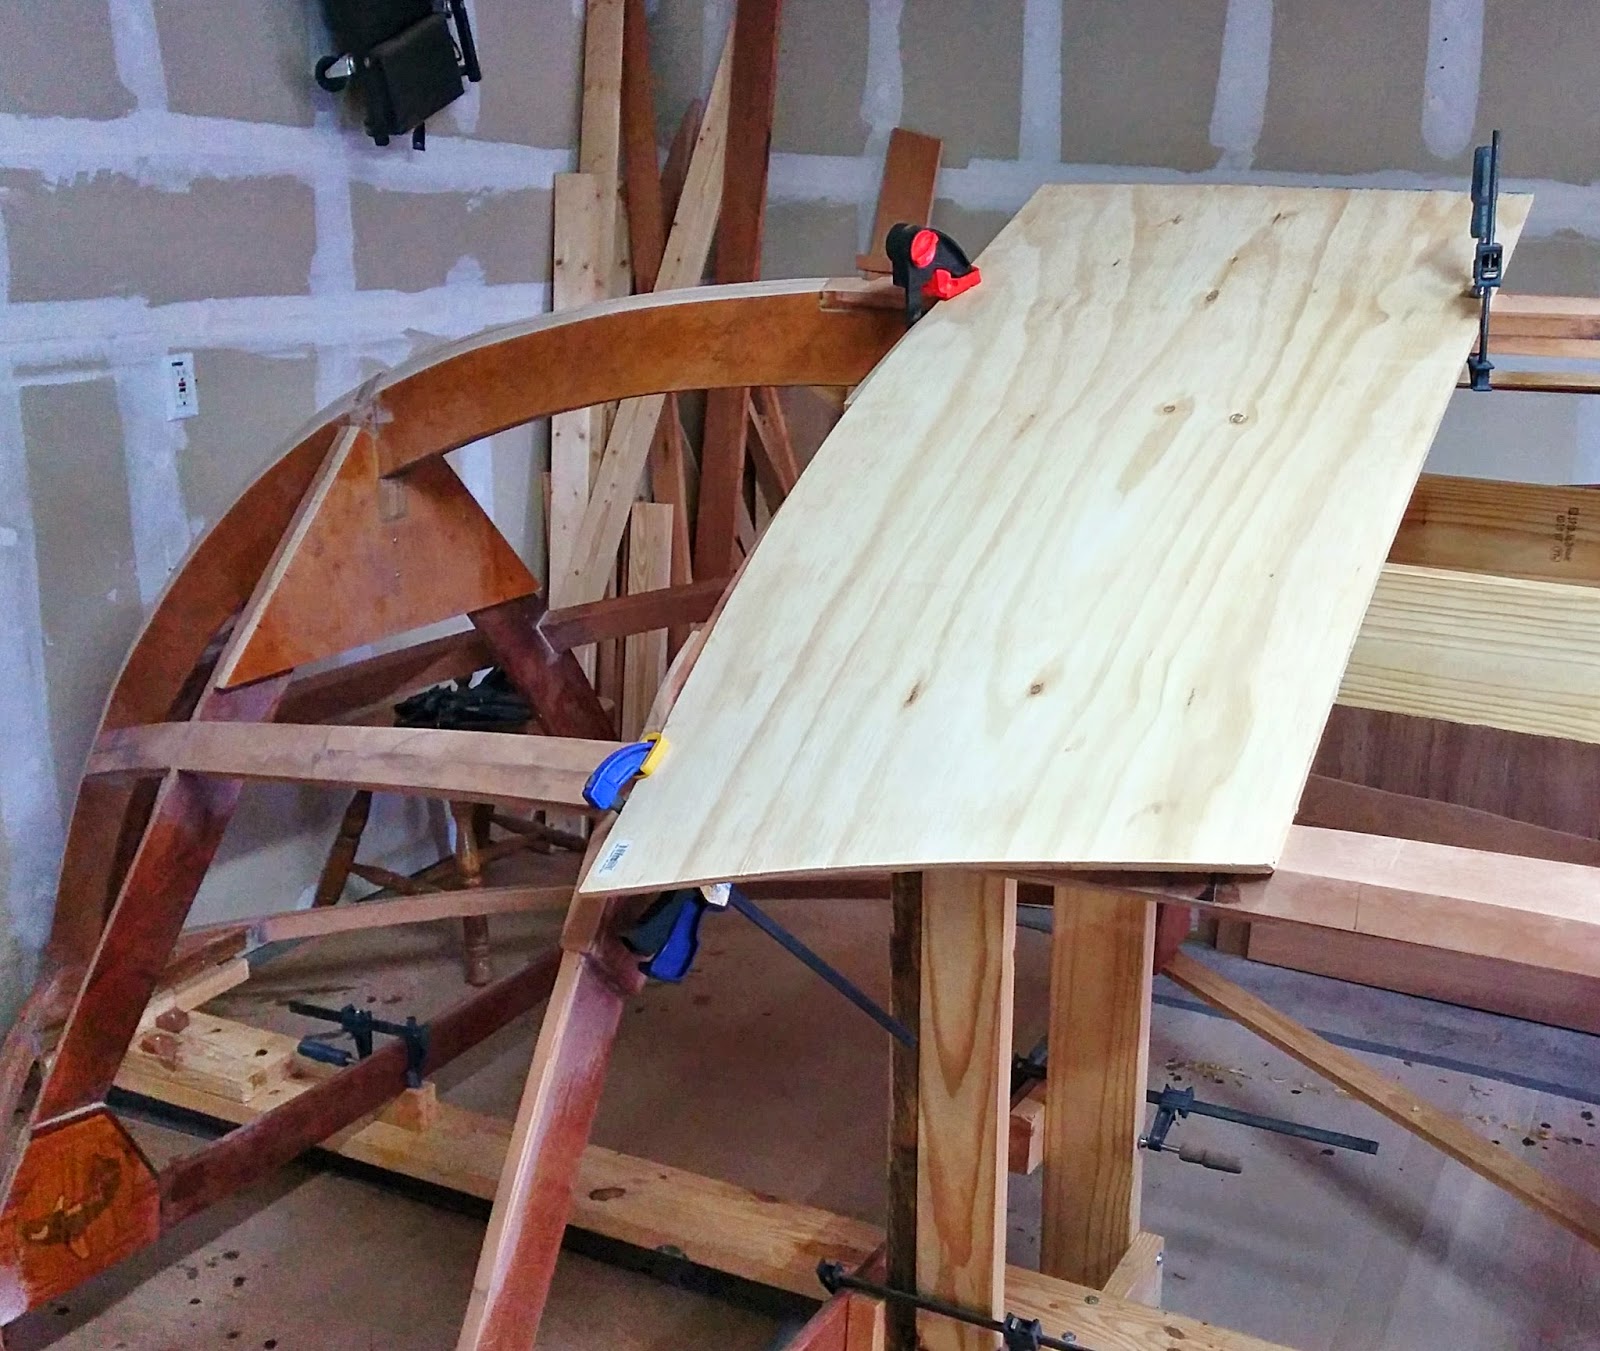
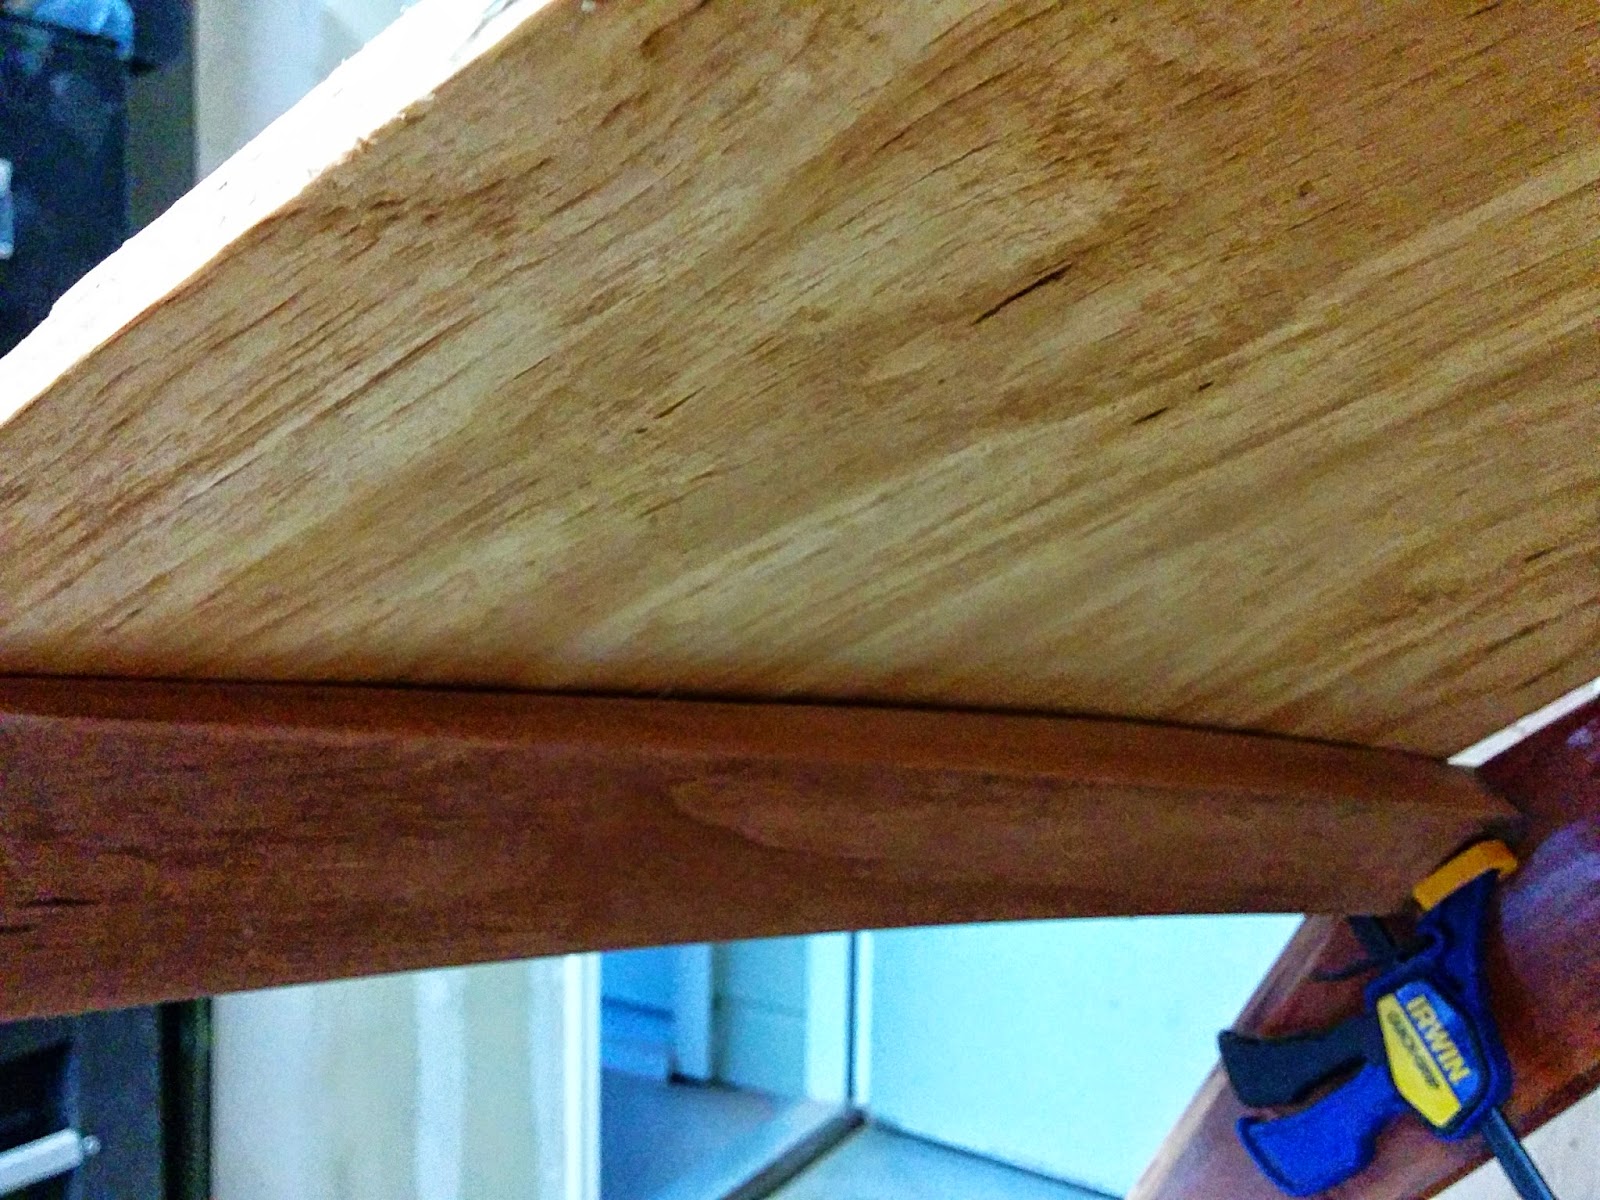
Frame 5s bottom edge will need to be faired to match the angle of the skin as it curves down to frame 6. I can do that using the test plywood as a guide. The same thing needs to be done at all the other bottom frame edges, but these will use the bottom battens temporarily installed as a guide for the correct angle. Aft of frame 4 the amount of material to remove is very small and I am confident that will go quickly.
Frames 4 and 5 will need their edges angle forward and down.
So the goal is to complete the remaining fairing work this month as well as fix all the various areas that need to be re-coated with epoxy. I also want to clean up the chine inner edges that are exposed in the cabin area so that they have a nicer appearance. Finally, I have some runs in the epoxy in a few areas from the last time I tried to re-coat. These will need to be smoothed out and re-coated as well.
In order to insure I get all this completed and dont miss anything, I divided the boat into 14 sections for inspection of work needed. These sections are numbered 1 through 7 from aft to forward and there are duplicate sections port and starboard, using the keel as the separator.
I inspected each section and noted any work that needed to be done. I will then tackle each section separately. This breaks the work into smaller manageable chunks.
The reason I want to accomplish all of this is because it will much more difficult to do after the skin is applied. When I get the plywood I need for skinning later this month, I want to focus entirely on fitting the skin and not have to worry about any loose ends.
I should be able to finish up the loose end work and the fairing by the end of October. This keeps me on track or my 12 month plan to complete and flip the hull by the Fall season of 2015. At least thats the goal.
Although September was difficult, the perseverance paid off. I am glad to get through this and can now start focusing on the next tasks.
Until next time, take care.
I am now satisfied with the fit of the test planking on the longitudinal members. I still need to fair the edges of the frames on the bottom, but that will require temporarily adding the bottom battens first, so I will cover that in the future.
What brought all of this about was when I first faired the port chine aft of frame 5 and then started test fitting the plywood. It was immediately apparent that the angle of the chine outer edge was off. The edge of the plywood would have had to wrap around the edge of the chine rather than lie on it flat (as was desired).
Further investigation using a batten stick revealed that the chine was flat from aft of the frame to forward of the frame. It should have been curved. Not good. The batten allowed me to see just how much additional material was needed.
It also showed why the test plywood wasnt lying correctly. If the chine had been further outboard, the angle of the chine outer edge would have been different. I tested more plywood with the batten in place and could see that if the chine was as far outboard as the batten indicated it should be, then the skin would have fit correctly (assuming that the angle also changed on the chine).
This shortage of material also meant that the frame edges on the sides were short. These had been faired down to the chine some time back. At that time I believed the chine to be in the correct position and didnt re-measure the frame width afterwards.
I checked the starboard side and found the same problem, although not quite as bad. Again, the frame edge came up short to the corrected curve. At this point I was pretty depressed about the whole affair and had to step away for several days.
I decided to first measure the frame width with the stick battens in place. The measurement at the corrected curve was the same as indicated on the plans. So I had to figure out a plan of action.
I decided to add shims to the chines first in two sections (forward and aft of frame 5). Then I would add shims to the frame edge on the sides to bring it back in line with the curve. All of this would be done one step at a time. I would ad the shims aft of the frame, fair them, add the shims to the frame and fair them, and then add the next shims forward of the frame and fair them.
I took measurements from the stick battens first so that I would know how much to taper the shims and how long they needed to be (as well as how thick). Because the chine outer edge was already faired on the side and the bottom surfaces, each section had to be done independently of the other.
Here is a shot of the first port side shim on the side mounting surface of the chine after fairing. You can see that I have also added the shim for the frame edge as well.

Here is a shot of the starboard side shim on the frame. It was necessary in order to get the frame to come out to the corrected curve on the chine. I havent cleaned any of this up other than to smooth out the epoxy. Part of my tasks this coming month is to re-encapsulate any areas that need the work.

Here is the port side shim aft of frame 5. I have already cut the new angle notches in this photo. The next step would be to blend them into a fair curve.

The fair curve to determine the depth of the notches was based upon several reference points. The measurements I took with the stick batten, the points where frames 4 and 5 intersected the chine correctly, and a fair curve determined by using the batten between the reference points.
Here is the same area after blending the angled notches.

I was apprehensive about doing all of this, but it turned out to be the correct approach. When I fitted the plywood later, it practically laid into position. No doubt the marine plywood (which is stiffer) will be more difficult, but there does not appear to be any sharp bends now and I am hopeful that everything will go smoother from here on.
The area forward of frame 5 had little angle needed so it was much easier to fix. That area was faired in as well and it also fits correctly now.
What I was after is illustrated in the next two shots. The test plywood lies on the chine and keel as well as the frame edge and doesnt require any real force to get it to conform. Furthermore, the second shot shows the fit of the joint on the chine.


Frame 5s bottom edge will need to be faired to match the angle of the skin as it curves down to frame 6. I can do that using the test plywood as a guide. The same thing needs to be done at all the other bottom frame edges, but these will use the bottom battens temporarily installed as a guide for the correct angle. Aft of frame 4 the amount of material to remove is very small and I am confident that will go quickly.
Frames 4 and 5 will need their edges angle forward and down.
So the goal is to complete the remaining fairing work this month as well as fix all the various areas that need to be re-coated with epoxy. I also want to clean up the chine inner edges that are exposed in the cabin area so that they have a nicer appearance. Finally, I have some runs in the epoxy in a few areas from the last time I tried to re-coat. These will need to be smoothed out and re-coated as well.
In order to insure I get all this completed and dont miss anything, I divided the boat into 14 sections for inspection of work needed. These sections are numbered 1 through 7 from aft to forward and there are duplicate sections port and starboard, using the keel as the separator.
I inspected each section and noted any work that needed to be done. I will then tackle each section separately. This breaks the work into smaller manageable chunks.
The reason I want to accomplish all of this is because it will much more difficult to do after the skin is applied. When I get the plywood I need for skinning later this month, I want to focus entirely on fitting the skin and not have to worry about any loose ends.
I should be able to finish up the loose end work and the fairing by the end of October. This keeps me on track or my 12 month plan to complete and flip the hull by the Fall season of 2015. At least thats the goal.
Although September was difficult, the perseverance paid off. I am glad to get through this and can now start focusing on the next tasks.
Until next time, take care.
Subscribe to:
Post Comments (Atom)
0 comments:
Post a Comment